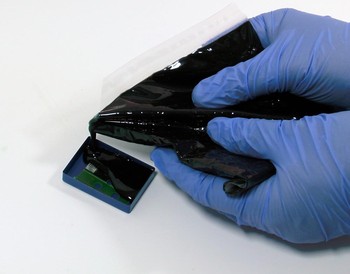
How you apply a thermal interface material or thermal paste is important for the effectiveness and reliability of the product. For the best results, the entire surface must be covered, but using only a very thin, uniform layer. Too much material can increase thermal resistance and therefore reduce the effectiveness of the thermal transfer. (Read More)
For manual application we would usually recommend using a screen, this allows you to apply a thin uniform layer while maintaining a cost effective process for small scale production. This process can also be automated using machine.
For manual application of a thermal paste using a screen, we recommend starting with a screen thread count of around 70 threads per cm. The thread count of the screen controls the thickness of paste applied and may need to be adjusted to suit your particular application.
Lay the cleaned heat sink or substrate, face up on a flat work surface. Place the screen evenly over the surface and apply a thick line of thermal paste at the far end of the screen using a spatula.
Using a squeegee that is wider than the substrate, slowly and carefully drag the paste over the surface, ensuring all areas are completely covered. Apply high pressure to the squeegee when in use and only pass over the surface once.
Gently lift the screen, slowly applying pressure so that you can see the screen separating from the surface. Do not lift the screen off quickly or unevenly as this may affect the distribution of the paste left on the substrate. If any errors do occur, clean the product from the screen and substrate by wiping off the excess with a dry cloth and then cleaning with Electrolube IPA.
Once removed, you should be left with a uniform layer of thermal paste on the substrate. Assemble the parts together immediately to avoid any contamination migrating onto the applied paste.


